Training the Singer Salesgirl in the 1920s
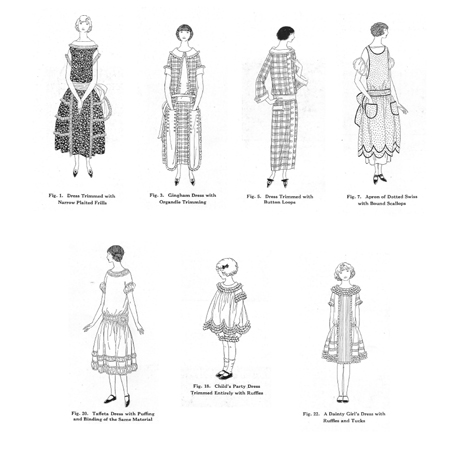
Fig. 1: Lesson 12 collage
The Singer Manufacturing Company had an Educational Department which provided manuals for the in-service training of their salesgirls in Singer shops in the use of their sewing machines. The manuals took the form of 12 lessons of instructions, each ending with projects for the salesgirl to make as samples for display in the shop.
The samples produced by each girl had to pass inspection by the 'Instructors of Sewing' of the Company. The girls were told that "it is important that details of a machine be thoroughly understood in order that you may give
real Singer Service to your customers." Today we would think the lessons very sexist; there are no references to male sales assistants and, with the exception of one suit for a small boy, none of the articles made are aimed at men's attire.
The first six lessons, each with twelve pages of text and pictures, dealt with the use of the standard attachments supplied with the machines. Lesson 4, for instance, provided instruction in the use of the various types of hemmer attachments (Fig. 2).
The projects at the end of the lesson comprise making samples, each 8 inches long, of the various types of hem. Lesson 6 used the ruffler and other attachments; the final page of this lesson is shown in Fig. 2 and concerns making a display book out of the various samples.
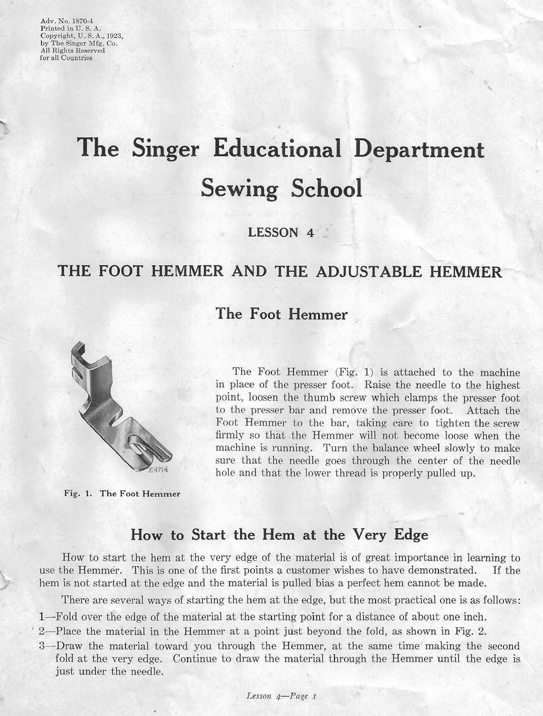
Fig. 2: Lesson 4, page 1
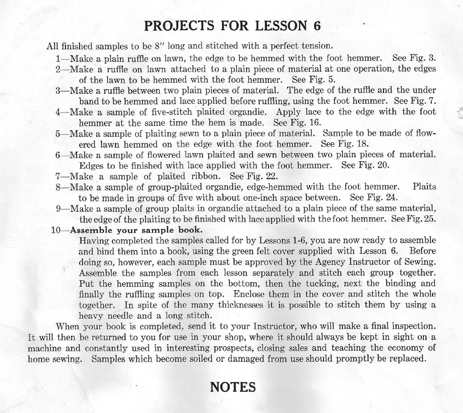
Fig. 3: Lesson 6, page 12
Salesgirls were expected to demonstrate the use of the attachments to prospective customers. Note the last paragraph about the use of the salesgirl's sample book in making sales.
The second set of six lessons gives instructions for making useful articles for display in the shop. The first, lesson 7, starts with a simple apron (Fig. 4, 5, 6).
To simplify finding suitable bits of fabric, students were told to use "materials in package ED34". All the garments made "must be inspected and passed by the 'Instructor of Sewing' before being displayed in the shop."
Girls were reminded that "the display of sample garments will lead to many inquiries from callers. It is therefore appropriate to summarize … the benefits a woman may derive from a good sewing machine, especially when it is a Singer Machine and she avails herself of that unique and valuable privilege, Singer Service.
So, it is 1923. Put yourself into the neatly buttoned shoes of a salesgirl approaching the final few lessons of her instruction manual. An apron and a child's romper suit are already made and on display. She can demonstrate how the machine can be used for embroidery, attach military braid and make buttonholes. Now she has to make dress trimmings.
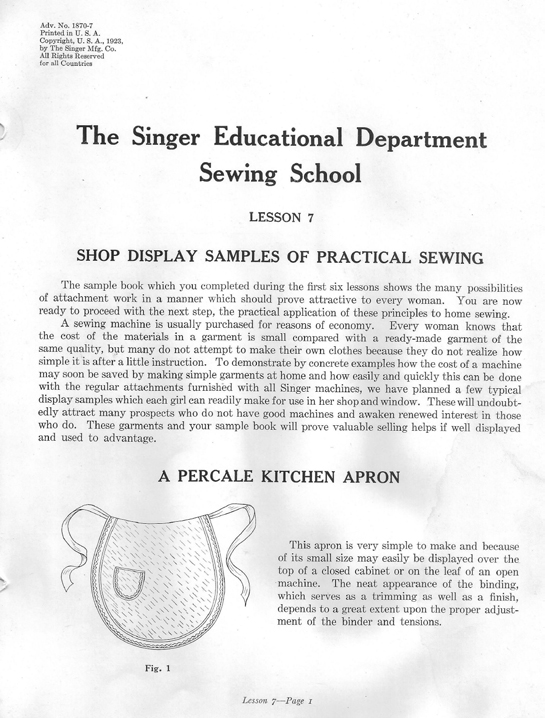
Fig. 4: Lesson 7, page 1
Her Instructor of Sewing has told her that the contemporary styles are so simple that the average woman with no sewing education can easily make an attractive garment, using a readily available paper pattern. However, although the pattern is simple, successful trimmings are more difficult.
The difference between a homemade look and the desired well-tailored finish lies in simple trimmings made and applied with the regular attachments supplied with every Singer machine.
So it is time for our salesgirl to make and display ruffles, frills, loops, scallops, puffs and especially collars and cuffs (Fig. 1). The ability to make collars and cuffs may sell the machine to office girls. A plain business dress needs only fresh collars and cuffs for variety.
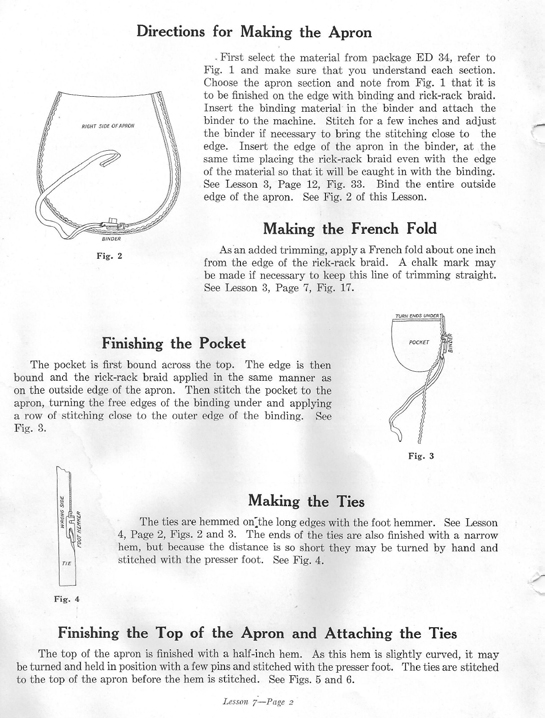
Fig. 5: Lesson 7, page 2
The popular 'sweater-blouse' also requires an endless supply of fresh collars made of washable materials.
"What woman", says lesson 12, "would not look forward to a new frock with pleasure when she has only to press the foot or knee control lightly and watch dainty tucks or ruffles sufficient for her garment produced in a few moments." (Plainly an electric machine was to be recommended.)
The final instruction to the keen salesgirl: "Talk home sewing to every woman who enters your shop."
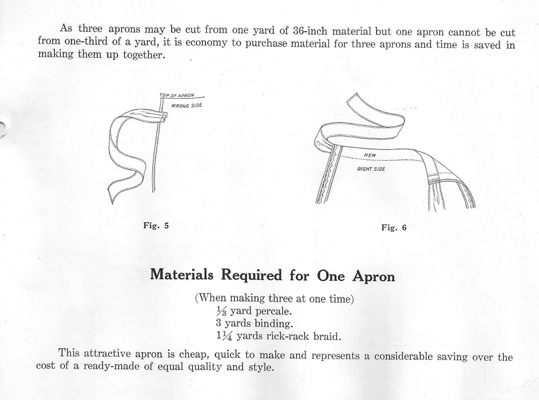
Fig. 6: Lesson 7, page 3
