


Restoration workshop
French polishing without tears
ON HEARING that several members had sent work out to professionals to have French-polishing done, restoration-expert Graham Forsdyke decided that it was time to tell members how to complete the work themselves. At the Loughton meeting in February he put on a demonstration aimed at showing how first-class results could be obtained by using traditional methods.
Graham started with his usual warning of "it at all possible, leave it alone".
Stripping and re-polishing an article would be considered nearly as drastic a move as re-painting a sewing machine.
Small scratches can often be removed by wiping a stain-impregnated rag over the wood and quickly buffing off the surplus. This way the stain -- choose one to match the existing color or a shade darker-- will sink into any exposed wood which has been scratched and blend it in with the remainder.
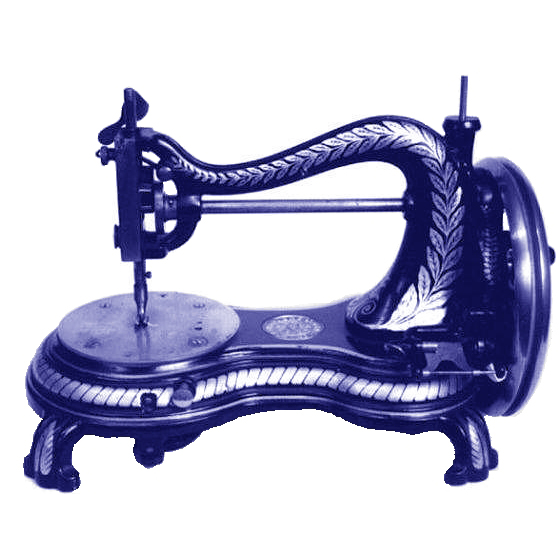
Two types of finished were used on early sewing-machine woodwork -- wax and French polishing.
Wax finishes were popular in America. Wheeler and Wilson in particular used this system which is simply achieved by applying a number of coats of hard wax to the wood, allowing each coat to dry and be buffed with a soft cloth before applying the next.
Many English manufacturers, however, used a French-polished finish and, although this is more time consuming, the results can be spectacular.
The ease of finishing off any piece of wood will depend on the closeness of its grain and the use of new wood for any project should be avoided wherever possible.
In Victorian times timber was seasoned over a period of years, but today it is fed through quick-dry kilns, and if it hasn't actually got sprouts coming from it, timber merchants will call it seasoned.
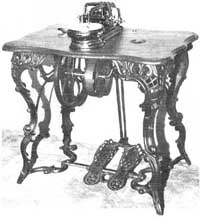
Well-made old wardrobes, gramophone cabinets and the like can often provide the necessary wood for a treadle top. Mahogony was the most-used timber and is still in plentiful supply, but a piece of walnut is now next- to unobtainable. Old wood should be stripped with something like Nitromores Original and given a wash over with methylated spirit immediately afterwards.
Let us assume the worst -- that you have to replace a treadle top with a piece of new wood.
Go for mahogany and ask your merchant to select a piece with as close a grain as possible. It's likely that you will not be able to find a piece of wood big enough for the job, but simply butting two or more pieces to together and gluing them is quite permissible as this was how most tops were made originally.
With the wood cut to shape and sanded it must first be stained. You have a choice of three types of stain, oil, spirit and water.
Water stain is hardest to use as it tends to lift the grain. I have found oil stains the best for work which is later to be polished.
Go for a mahogany stain, but not a red mahogany which will be far too vivid for such an utilitarian object as a sewing machine. Test the stain on the underside of the table and if necessary add a little dark oak, walnut or Jacobean stain to darken. The test color will darken a little as the polish is applied.
Leave the job at least a day and then apply with a brush a coat of filler/sealer which helps form a skin on the wood and prevents subsequent casts of polish simply soaking in. With old wood the sealer can be omitted.
After a couple of hours the sealer can be sanded down using a 220 grade of paper and the real French-polishing can begin. French polishing is the name given to the process. What is applied is one of a variety of polishes made up from a solution of shellac in spirit. The best for our use is called button polish by the trade and comes in a variety of forms, the paler being the most expensive but giving the best results in letting the grain of the wood show through. Other polishes such as garnet give a progressively-darker finish the more coats that are applied, but tends to mask the natural beauty of the wood.
The polish is applied by means of a rubber which is formed by a ball of wadding covered in a piece of linen. The rubber is charged by applying the polish to the wadding, wrapping it in the cloth, and then applying it to the work. By squeezing the rubber, the amount of polish seeping thorough the cloth can be regulated.
Move the rubber in small circles over the wood, leaving an overlapping swathe of polish. Never stop the rubber on the work, even to change direction. Leave the job to dry for a few minutes and inspect. Any ridges or tears of polish are no great problem as they can be dealt with later, but they indicate too much polish in the rubber or too much pressure on the job.
Repeat the above process two or three more times, watching out for any dragging of the rubber. If this happens, wait a few minutes before continuing.
You should now begin to see the start of a shine to the wood and at this stage the work should be put to one side for a few hours to allow the polish to harden a little.
Running your fingers over the dried surface will reveal a far-from-smooth finish, so now the job must be fine papered. I like to use a few drops of white oil on the 320 grade finishing paper. This avoids the paper becoming clogged and also helps in the next "bodying-in" stage.
With the surface of the wood smooth and with a flat appearance from the papering it's back to the rubber, slightly less charged with polish than before.
Repeat the above process, adding a few drops of oil either to the wood or to the outside of the rubber itself. But be careful not to overdo the oil.
You need just enough to help the rubber to glide. Too much and it will be difficult to absorb without the use of methylated spirit added to the rubber which can be tricky for the amateur polisher.
Eventually, after four or five applications, the shine will begin to appear. Test smoothness regularly with the fingertips and, if necessary, use a well-worn piece of paper to clean up.
Any specks in the polish are likely to be dust particles and are easily removed with the paper, but being able to work in a dust-free atmosphere reduces the risk of this considerably.
With the job looking perhaps too glossy it's time to put it to one side for a day to allow the polish to harden
Now it's time to reduce the sheen. High gloss is only found on pianos and the like and we need a slightly-more-utilitarian finish for our table top.
The job may be dulled down by careful application of 0000 grade wire wool heavily impregnated with black wax and polished with a soft cloth.
Another method, and one which I favor, is to brush powdered pumice stone onto the work and then wax afterwards. Some professionals will produce their own mixture of wax and pumice to do the job in one application.
Producing a good, workman-like French- polished job is not the sole preserve of the master craftsman. It's something you can do at home, saving a lot of money and gaining considerable satisfaction.
The products I have listed above should be available at good-class hardware stores -- not the Wicks, B&Q variety.
Each town will have its specialist supplier and a little judicious enquiring should track them down. The wax I refer to is also sold in many antique shops as black wax or antique wax, but is likely to be more expensive than from a specialist supplier.
What you need
If stripping old wood, Nitromores Original (watch your hands and eyes, this stuff bites!)
Finishing paper in grades 220 and 320 or thereabouts.
Wire wool grade 0000.
White oil.
Button polish (Best Pale for top results).
Wax, see above
Disposable rubber gloves and a couple of brushes.
Methylated spirits -- this will clean brushes, your table tops and your best shirt.
Graham Forsdyke